Tutorial Jetstream2 & Jupyter Setup
Note: This page was generated from a PowerPoint file. Formatting has been simplified.
Exosphere: Logging In
Exosphere: Logging In
Before you can log in to Jetstream2, you must have or be added to Jetstream2resources on an active ACCESS allocation.
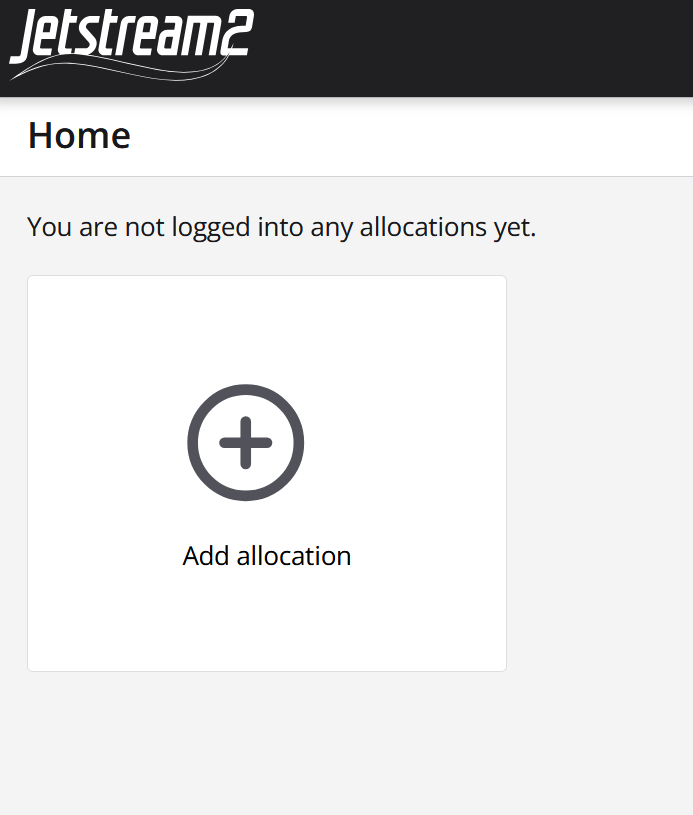
Log in to Exosphere: https://jetstream2.exosphere.app/
Exosphere: Logging In
Exosphere: Logging In
Select “Add allocation.”
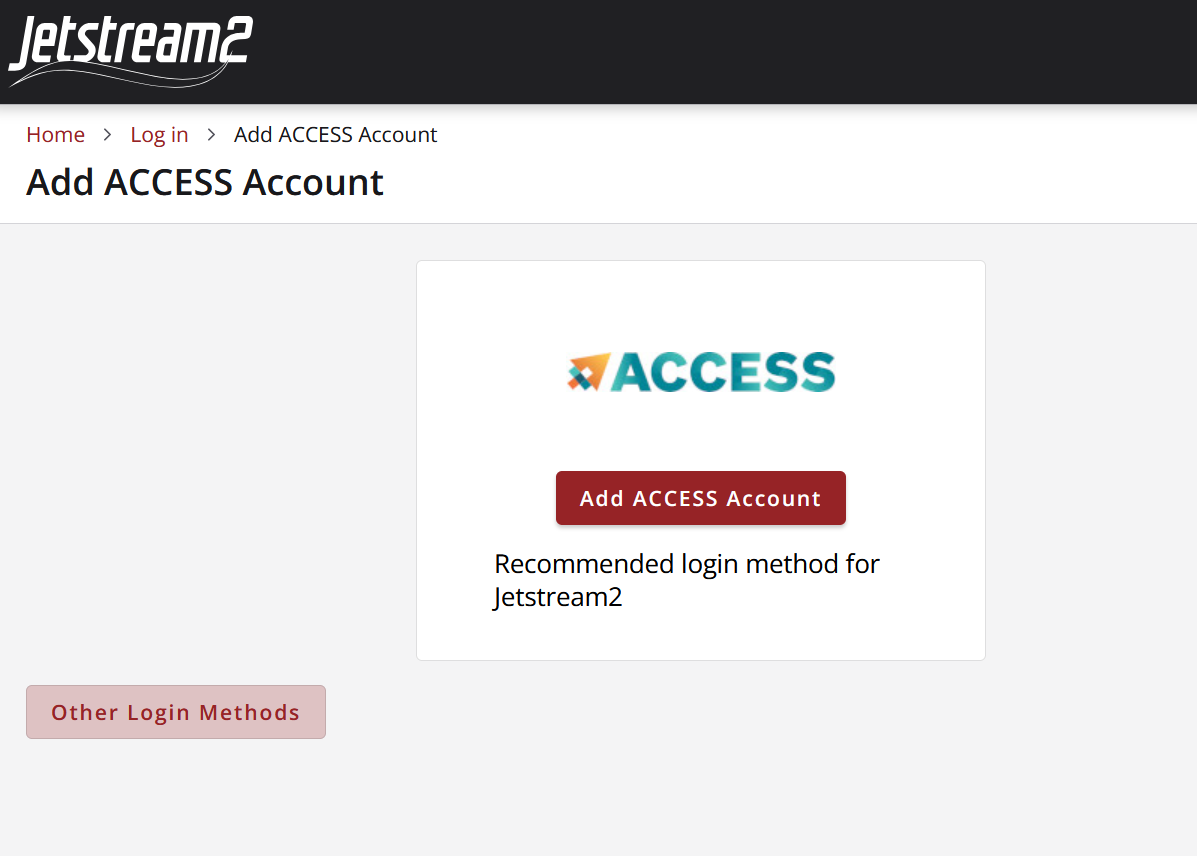
2. Select “Add ACCESS Account.”
Select “Add ACCESS Account.”
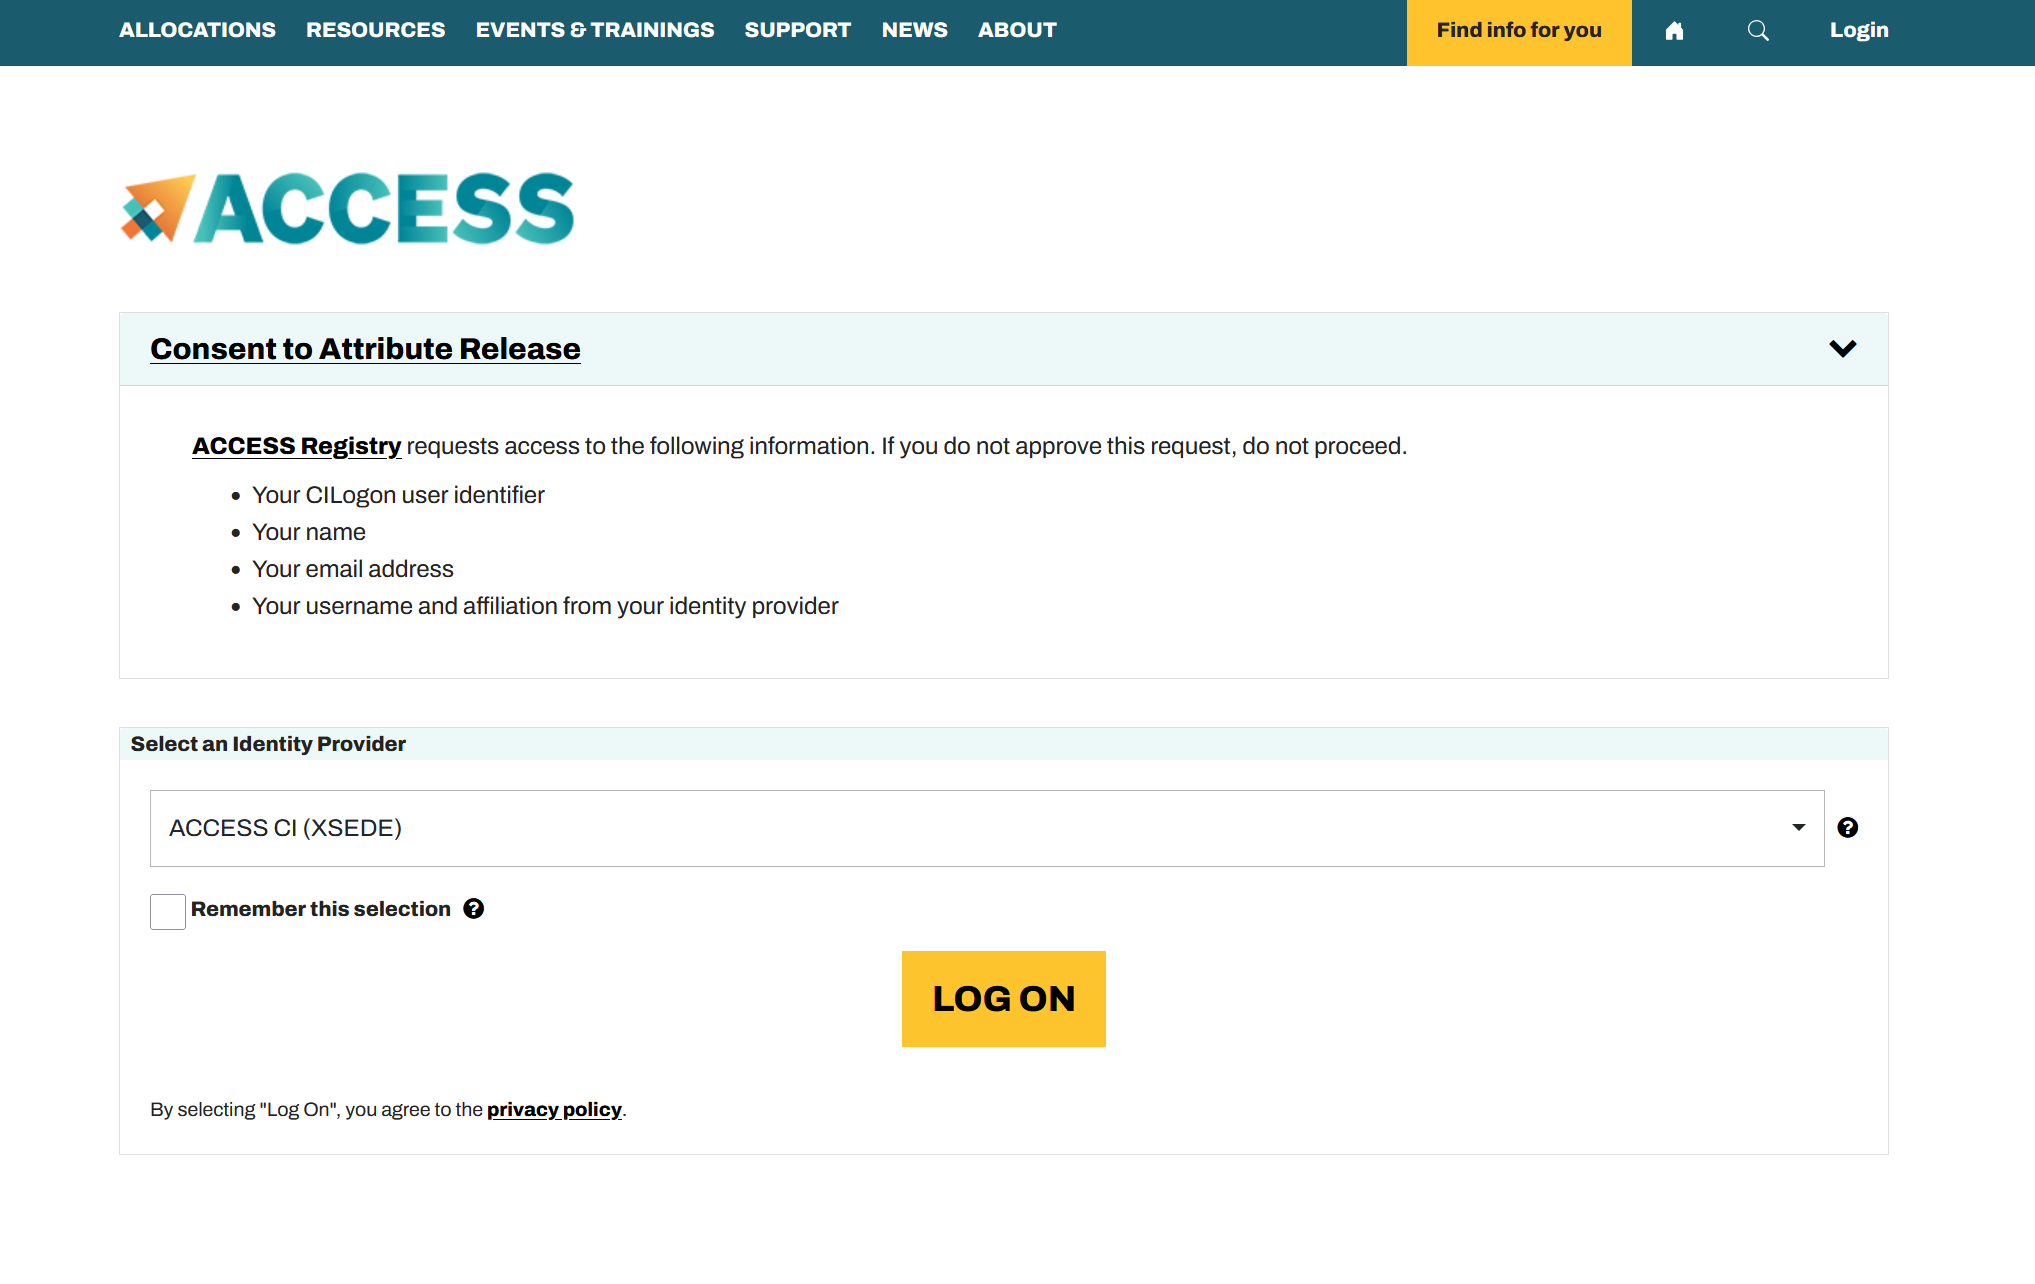
3. From the dropdown menu, select “ACCESS CI (XSEDE)” as your identity provider.
From the dropdown menu, select “ACCESS CI (XSEDE)” as your identity provider.
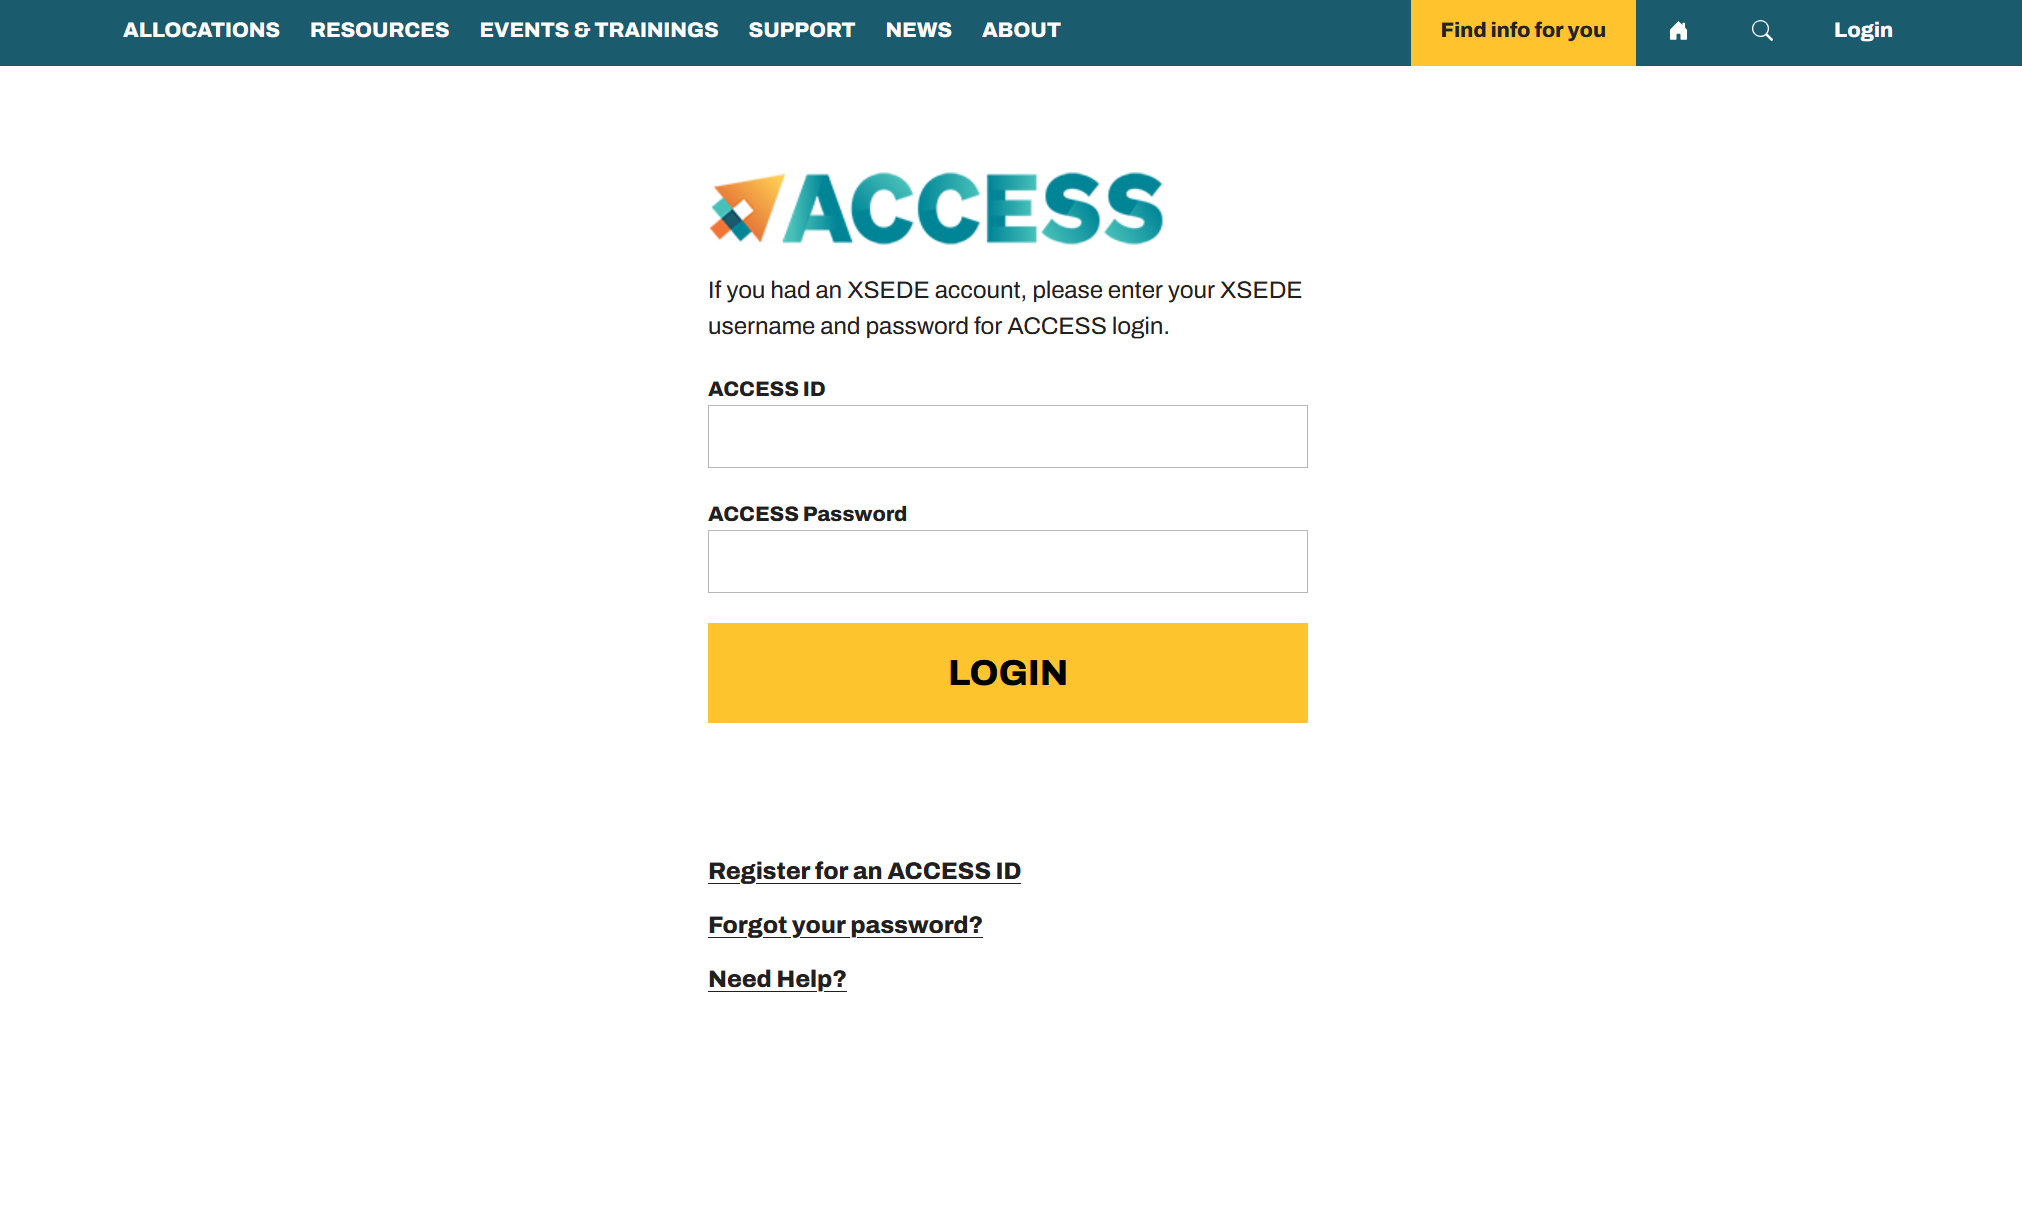
4. Enter and log in with your ACCESS credentials.
Enter and log in with your ACCESS credentials.
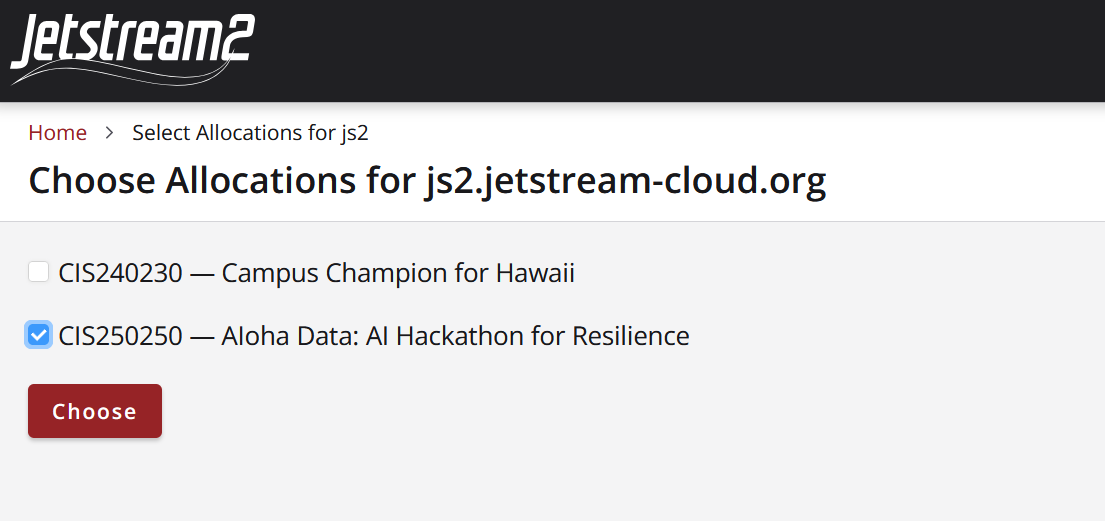
5. Select your allocation. For the tutorial, select CIS250250.
Select your allocation. For the tutorial, select CIS250250.
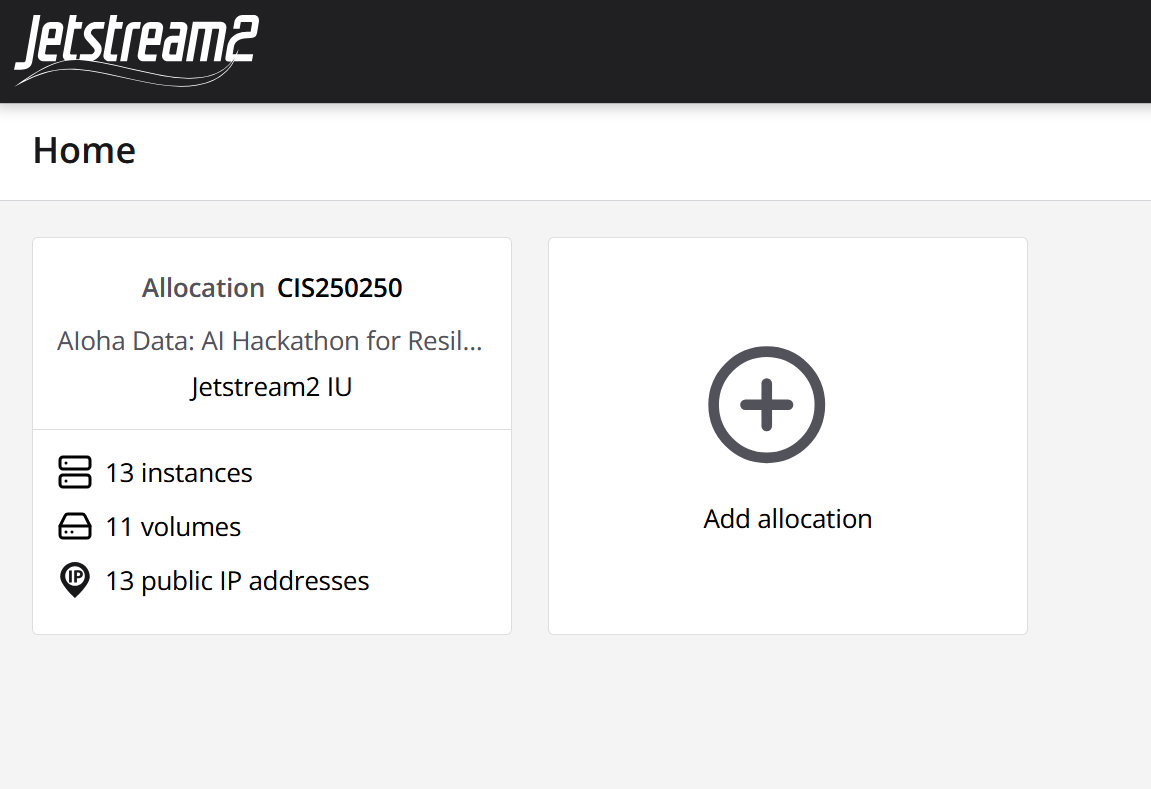
6. The allocation should now appear on the Exosphere Home page. You are ready to begin working with Jetstream2.
The allocation should now appear on the Exosphere Home page.You are ready to begin working with Jetstream2.
Workshop Allocation
Workshop Allocation
Workshop participants may continue to experiment with the workshopallocation for approximately 24 hours, but will be removed from resources shortly afterwards. Participants who were already on the allocation will not be removed, but will be unassigned from resources which they did not already have access to.
Next Steps: Jetstream2 Trial Allocation
Next Steps: Jetstream2 Trial Allocation
Test drive Jetstream2 before getting your own ACCESS allocation - 90 days of Jetstream2 usage - Limited resources: 1 m3.tiny or one m3.small virtual machine instance
GPUs not available in trial allocation
1 virtual machine backup snapshot per instance
10 GB disk storage volume
Sign up for a trial allocation - Register your ACCESS ID - Visit the Jetstream2 trial allocation portal and select “enroll” https://portal.jetstream-cloud.org/
If using Exosphere, the allocation is named with your ACCESS username plus “JTA User”
If using Horizon, it is labeled with only your ACCESS username
Jetstream2 Trial Allocation Portal
Resources
Resources
Jetstream2 Training and Events by IU: https://jetstream-cloud.org/news-events/events/index.html
LLM Web-chat Interface Tutorial: https://docs.jetstream-cloud.org/general/llm/
ACCESS User Registration: https://operations.access-ci.org/identity/new-user
ACCESS Allocations Portal: https://allocations.access-ci.org/
ACCESS Support: https://support.access-ci.org/open-a-ticket
ACCESS Project Types: https://allocations.access-ci.org/project-types
Preparing ACCESS Requests: https://allocations.access-ci.org/prepare-requests
Jetstream2 Getting Started User Guide: https://docs.jetstream-cloud.org/getting-started/overview/
Jetstream2 Website: https://jetstream-cloud.org/
Jetstream2 Documentation: https://docs.jetstream-cloud.org/
Jetstream2 Usage Estimation Calculator: https://docs.jetstream-cloud.org/alloc/estimator/
Jetstream2 Instance Flavors: https://docs.jetstream-cloud.org/general/vmsizes/
Hugging Face: https://huggingface.co/
Llama-3.2-1B-Instruct: https://huggingface.co/meta-llama/Llama-3.2-1B-Instruct
Research Cyberinfrastructure at UH: https://www.hawaii.edu/its/ci/index.html
Create VM
Create VM
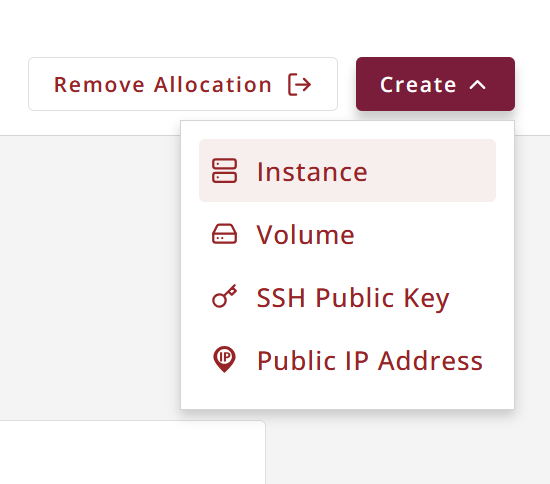
Click on the “Create” button in Exosphere and select “Instance.”
2. Click on “By Image” to view the images on the allocation and select the workshop image - in this case ML-for-LifeScience-UH
Click on “By Image” to view the images on the allocation and selectthe workshop image - in this case ML-for-LifeScience-UH

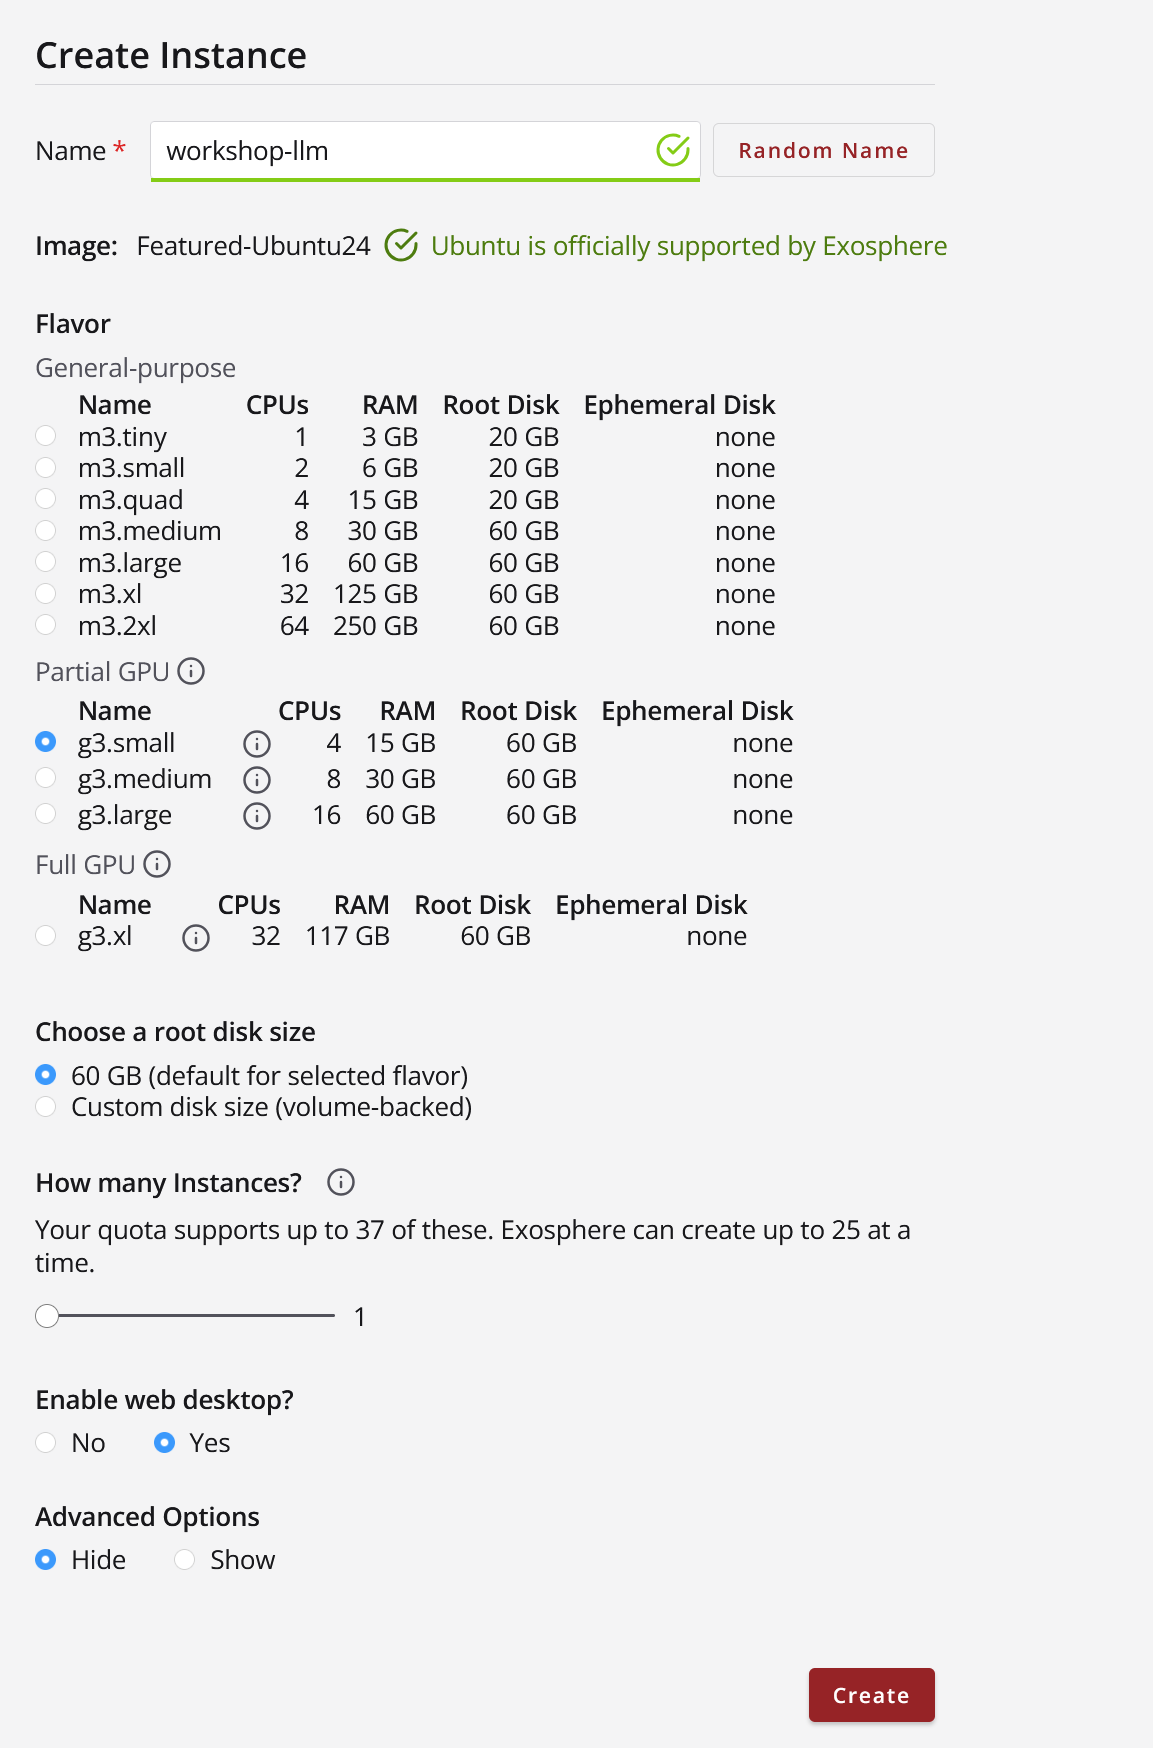
3. Provide a name for the Instance like your username-mlwk and select “g3.medium.” for Flavor
No graphical remote desktop need, Leave it as “No” under “Enable web desktop.” Leave other values default.
Provide a name for theInstance like your username-mlwk
and select “g3.medium.” for Flavor
No graphical remote desktop need,Leave it as “No” under “Enable web desktop.”Leave other values default.
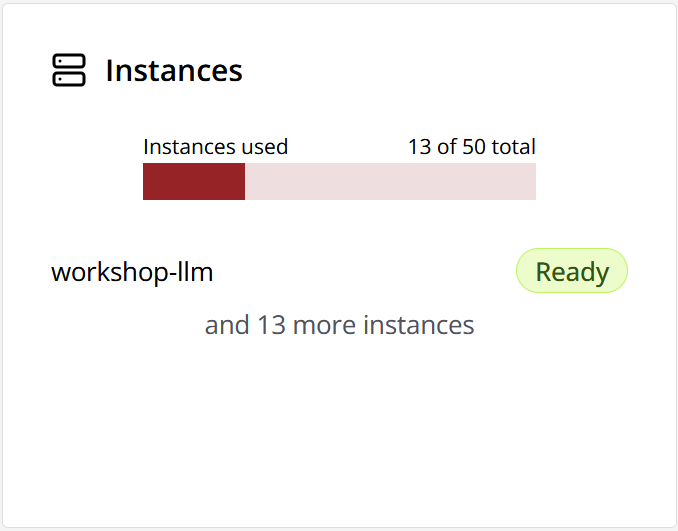
4. Wait until the instance is ready to use. Might take about 5 minutes…
Wait until the instance is ready to use. Might take about 5 minutes…

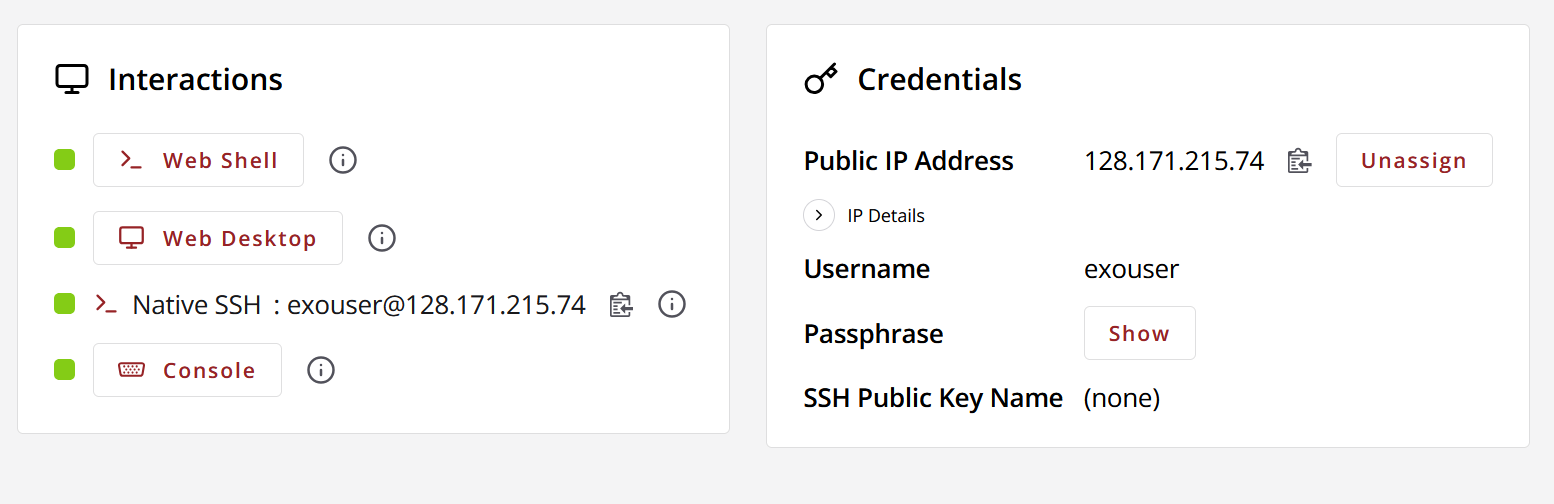
4. Log into the instance via SSH or the web shell.
Log into the instance via SSH or the web shell.
Start Docker Container with Tensorflow and Jupyter - copy and paste into your terminal
If you have problems pasting into the web shell try CRTL+ALT+SHIFT and paste into the clipboard do CTRL+ALT+SHIT again to close the side pop-out and then do CTRL+SHIFT+V to paste what is in that clipboard 6. Go to the VM ip address in the browser ex http://128.171.215.74:8888 to open the jupyter session —————————————————————————————————————————————————————————————————————————————————————————————————————————————————————————————————————
Start Docker Container with Tensorflow and Jupyter - copy and paste into your terminal
If you have problems pasting into the web shell try CRTL+ALT+SHIFT and paste into the clipboard do CTRL+ALT+SHIT again to close the side pop-out and then do CTRL+SHIFT+V to paste what is in that clipboard
Go to the VM ip address in the browser ex http://128.171.215.74:8888 to open the jupyter session
docker run --gpus all -it --rm \
    -p 8888:8888 \
    -v "/home/exouser/Documents/life_sciences_ML_on_JS2/tacc-deep-learning-tutorials:/tf/project" \
    tensorflow/tensorflow:2.14.0-gpu \
    bash -c "pip install jupyter && jupyter notebook --notebook-dir=/tf/project --ip 0.0.0.0 --port 8888 --no-browser --allow-root --ServerApp.token='ml-workshop'"
The Jupyter Session
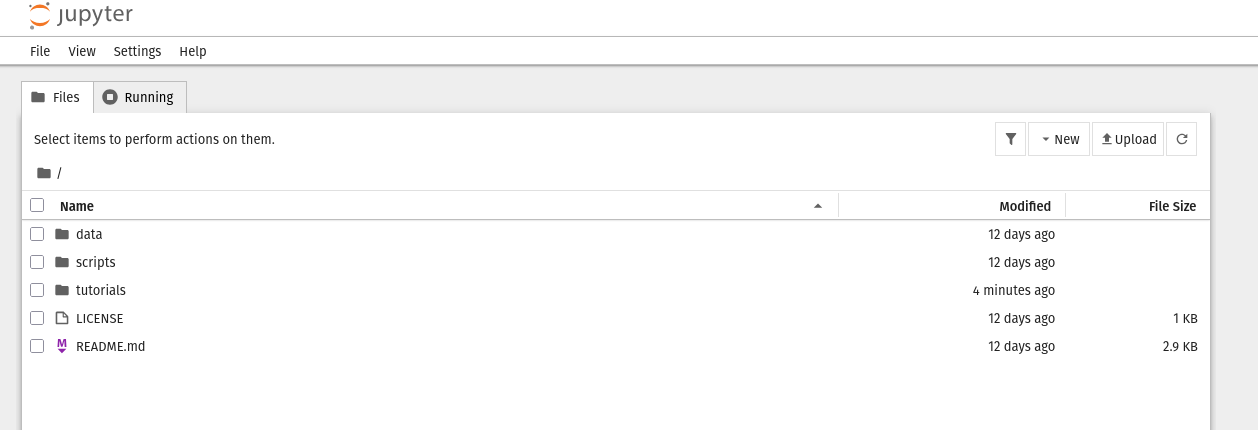
Open a new notebook (new button near the upper right corner) and we can copy and past the following code to complete installing dependencies for this workshop:
This cell will confirm that your environment is correctly configured:
 1import tensorflow as tf
 2
 3# Check if TensorFlow can detect a GPU
 4print("Num GPUs Available: ", len(tf.config.list_physical_devices('GPU')))
 5
 6# Print TensorFlow version
 7print(tf.__version__)
 8
 9# Set random seed for reproducibility
10tf.random.set_seed(123)
You should see the following output:
Num GPUs Available:  1
2.14.0
0.2 Install Required Dependencies
Before we begin working with the coral image dataset, we need to install several Python libraries for image processing, data manipulation, and visualization.
Install Core Libraries:
Run the following command to install the main dependencies:
1!pip install Pillow pandas matplotlib scikit-learn seaborn tqdm
This will install:
Pillow: For image loading and processing
pandas: For data organization and manipulation
matplotlib and seaborn: For data visualization
scikit-learn: For machine learning utilities and metrics
tqdm: For progress bars during training
Install Compatible NumPy Version:
TensorFlow 2.14.0 requires NumPy version < 2.0 for compatibility. Install the correct version:
1!pip install "numpy<2.0"
Verify Pillow Installation:
To ensure Pillow is properly installed and available to the notebook, run:
1import sys
2!{sys.executable} -m pip install Pillow "numpy<2.0"
3import PIL
4print(f"PIL version: {PIL.__version__}")
5print("Pillow installed successfully.")
You should see output similar to:
PIL version: 12.x.x
Pillow installed successfully.
Reload the Kernel:
Important
After installing PIL (Pillow), you must restart the kernel for the notebook to recognize the package.
To restart the kernel:
In Jupyter Notebook, click Kernel in the menu bar
Select Restart Kernel (or Restart)
Confirm the restart when prompted
After restarting, re-run the GPU check code from Step 0.1 to reinitialize TensorFlow before proceeding.
Appendix D: Acronyms
Appendix D: Acronyms
NSF - National Science Foundation
ACCESS - Advanced Cyberinfrastructure Coordination Ecosystem: Services & Support
NAIRR Pilot - National Artificial Intelligence Research Resource Pilot
HPC - High-Performance Computing
VM - Virtual Machine
EPSCoR - Established Program to Stimulate Competitive Research
LLM - Large Language Model
HIPAA - Health Insurance Portability and Accountability Act
FERPA - Family Educational Rights and Privacy Act
ITAR - International Traffic Arms and Regulations Act
IU - Indiana University